We get a lot of questions from our first-time expecting parents, and one of the most common is about how to lay out the nursery floor plan. This can often be intimidating since it’s hard to visualize just by standing in your space, especially if you don’t even know what pieces you need to include.
Your nursery floor plan needs to be functional, convenient and safe. Planning this all ahead of time is key! You don’t want to end up in a situation where you’ve ordered a bunch of furniture that doesn’t actually fit in your nursery. Avoiding these mistakes up front can save you thousands of dollars and tons of stress. Here are some tips about planning your nursery layout!

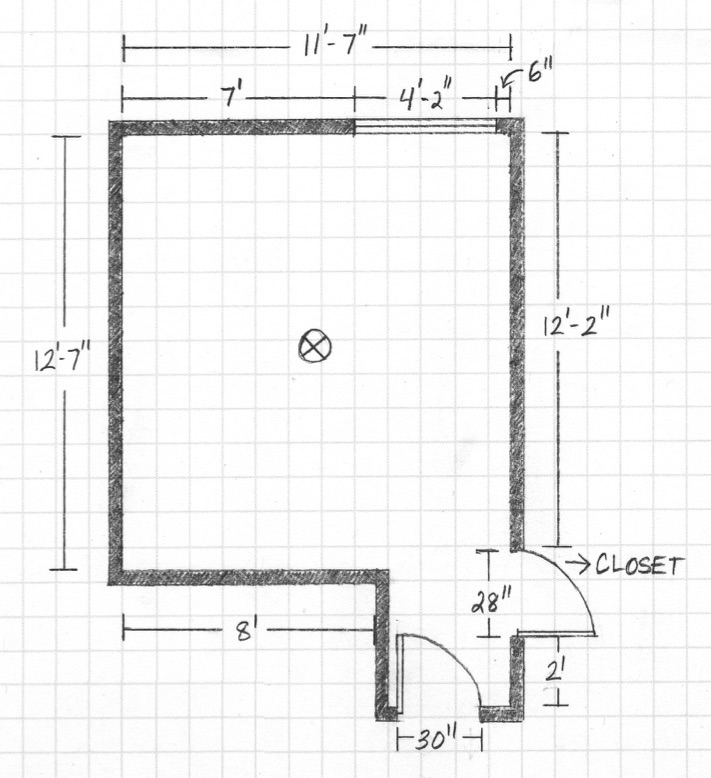
1. Draw your space. As tempting as it might be to use an app for this, good ‘ol pencil and paper is the best way to get the most accurate measurement. Start by drawing the shape of your room on a blank sheet of paper, or graph paper. Then draw where the windows and doors are. It doesn’t have to be accurate since you’ll be adding in actual measurements next.

2. Measure your space. Start by measuring each full wall, from corner to corner, and mark that on your drawing. Then measure each window and door, from the outside of the casing/molding. Next, measure the space you have below each window (this will tell you if you can fit any furniture below the windows). Lastly, measure the ceiling height.
3. Plan where the crib goes. The crib is the most important piece of furniture for the nursery, and it has to be placed in a safe spot. Ideally, the crib will be on a wall with no windows and no other furniture within at least 12″ of it. If you have plenty of options, think about placing the crib on a wall that’s visible from your hallway so you can peek into the room without walking inside. It’s also ideal if the crib is centered on a wall for aesthetic purposes. If you find out that you can’t fit a full size crib, you can look into mini crib options.
4. Fill in with other furniture. Once you have the crib placement in mind, you can see where the dresser and glider will fit. Dressers come in lots of sizes, so you can see what size will fit best in your space. Gliders often go in corners. Pro tip: make sure you leave space for the glider to rock back and forth!
5. Plan for other decor. Any other space you have can now be filled in with other smaller pieces, like a side table, bookcase, etc. All these little things like the diaper pail, storage bins and ottomans take up space on the floor, so it’s important to plan ahead for them. Keep in mind that everything will be a potential safety hazard, even to you as a parent walking into the room in the middle of the night. Keep the room as open and free of clutter as possible.
6. Visualize it. If you’re tech savvy, hop on a free layout software like Floorplanner (which is what we used below). If you’re more DIY minded, tape out your layout with blue painter’s tape directly on the floor. Doing this can be very helpful to see how close furniture will be to other pieces, and how much open space there will be in the room.

We put a ton of attention into the floor plan when we design nurseries, and it can often be fairly complex. There is a full chapter on the nursery floor plan in my book, Your Perfect Nursery, available at all major book retailers! We walk you through the entire process detailing each piece of furniture and its functionality, along with a full chapter just for nursery safety too.
Need help with your nursery floor plan? We do Virtual Nursery Design across the country! Take a look at our design services page—we do book up in advance!

