Nursery window treatments are one of the trickiest aspects of the design process. There are so many options and so many potential safety issues. And of course, they need to function. When we use drapery in a nursery design, most clients don’t know exactly what hardware to use, or how to use it. This is where curtain rings come in. Adding rings to your curtains can make them much easier to open and close, and they also give the room a more designer feel. But how do you use curtain rings?
First of all, this isn’t the easiest DIY, so if you’re able to hire a professional, that’s definitely ideal. But if you’re willing to roll up your sleeves, then here’s how to do it.
What You’ll Need:
- Your curtains (see our Ultimate Guide to Blackout Curtains for options)
- Curtain rod with brackets (see this post for some options)
- Curtain rings (usually 7-10 per panel depending on panel width)
- Drapery pins (same amount as rings but it’s good to get extras)
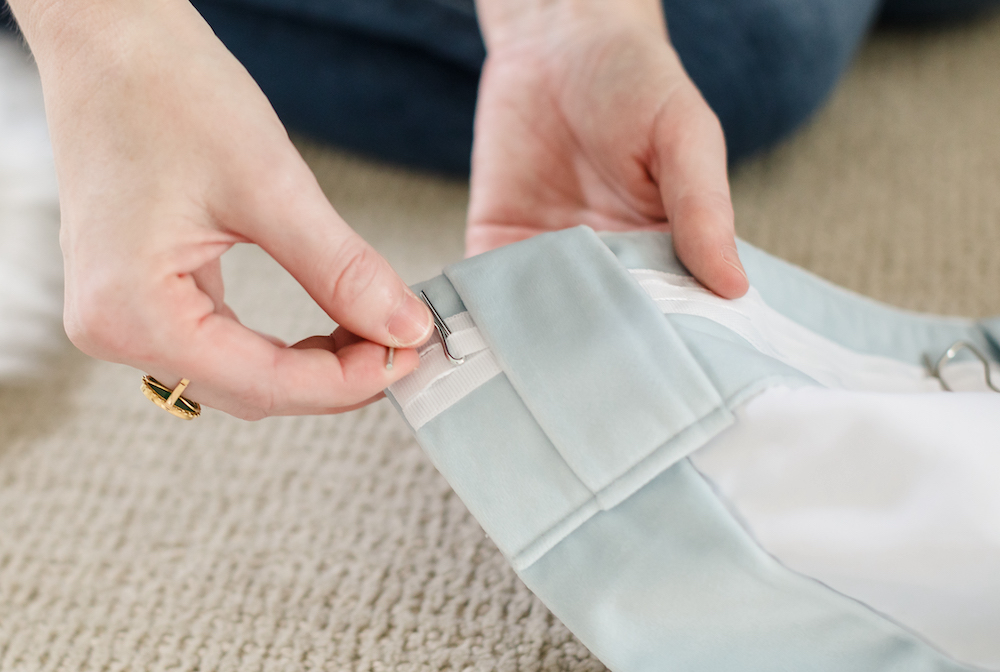
Step 1: Add drapery pins to your curtains. Your curtains may come with a “belt” or hoops on the top. You can insert your drapery pins into that. If your curtains don’t have the belt, you can put them directly into the back of the fabric.
You will need about 7-10 drapery pins per curtain panel depending on the width of the panel. Lay your curtain panel flat, backside facing up. Start with one pin at each edge, then space out the rest evenly. Typically the pins are placed about 6-8” apart.
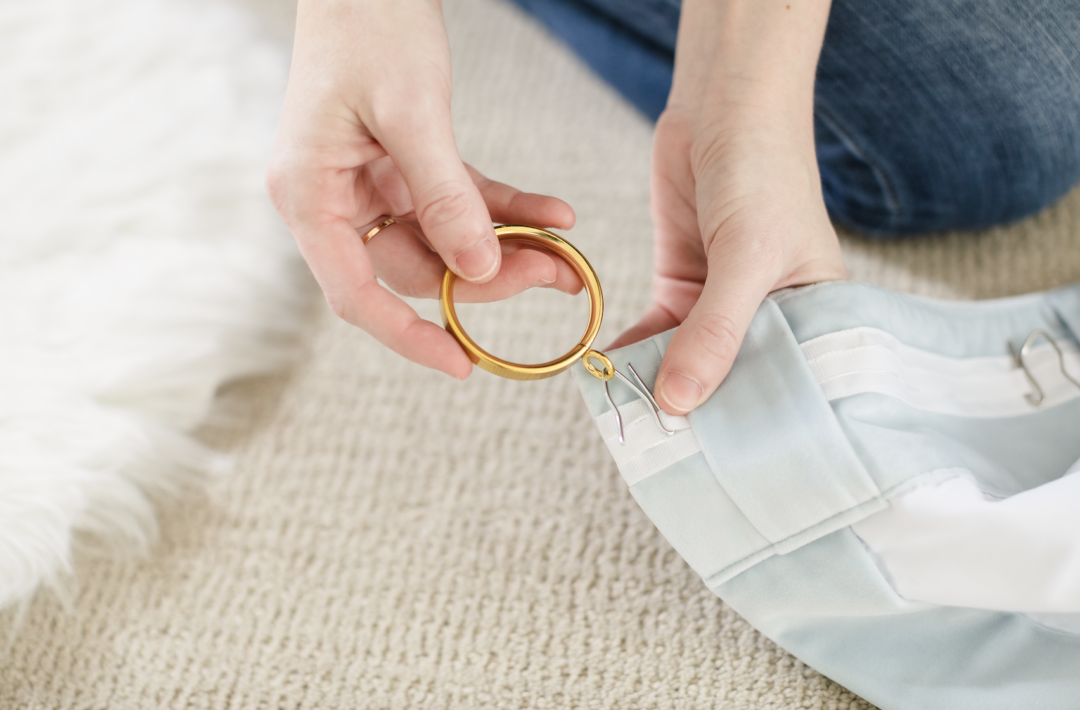
Step 2: Add the rings to the drapery pins. Attach each ring to a drapery pin.
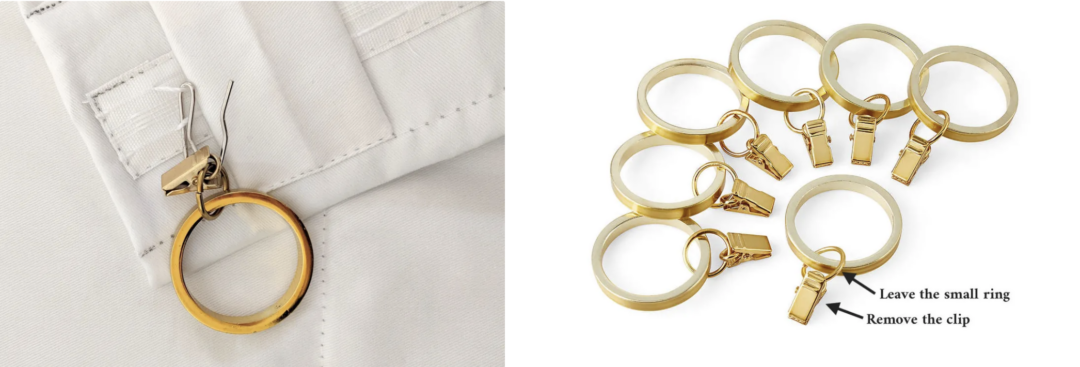 Left: Hiding clips (leave the clip on, but use the loop to attach to the drapery pin). Right: Removing clips (photo via Crate & Barrel)
Step 2.5: (Optional) Remove clips from the rings. Most curtain rings come with clips. If your rings didn’t come with clips, you can skip this step! Some people use these to clip directly to the curtain, but they don’t look great and don’t hold a lot of weight. If your child pulls on the curtain, the clips can come down. Blackout curtains are heavier, so we always recommend either removing the clips or hiding them behind the curtain. You will likely need needle-nose pliers to remove the clips.
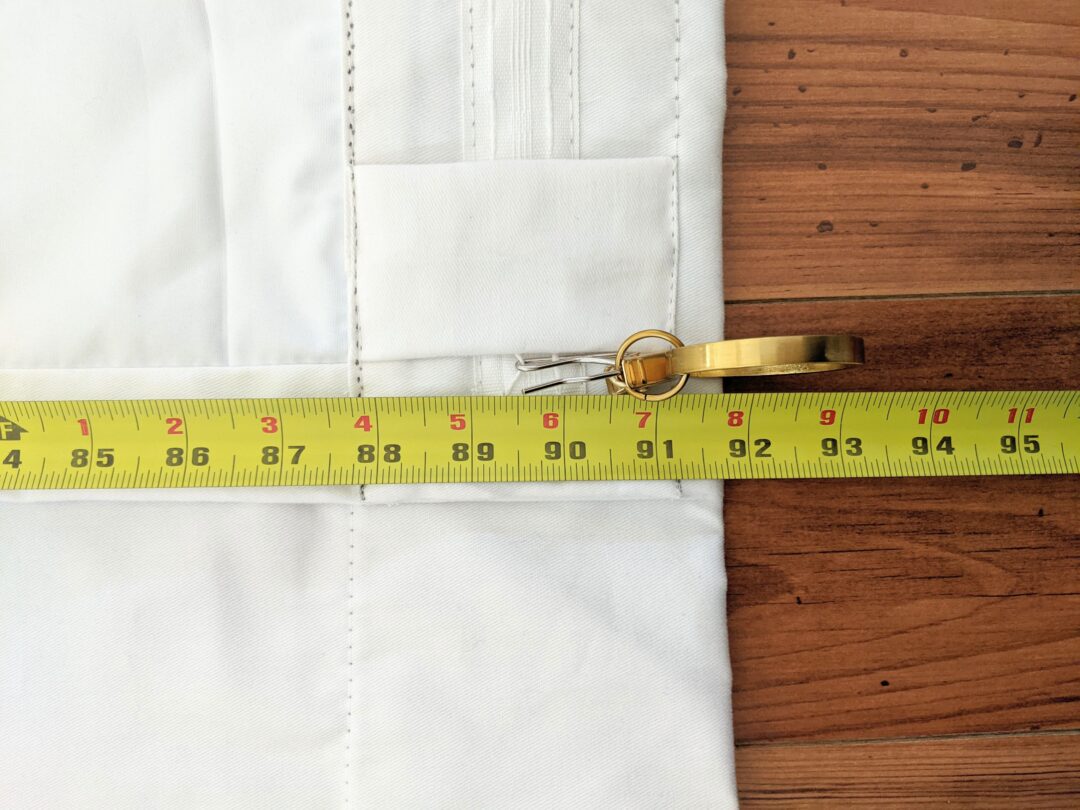
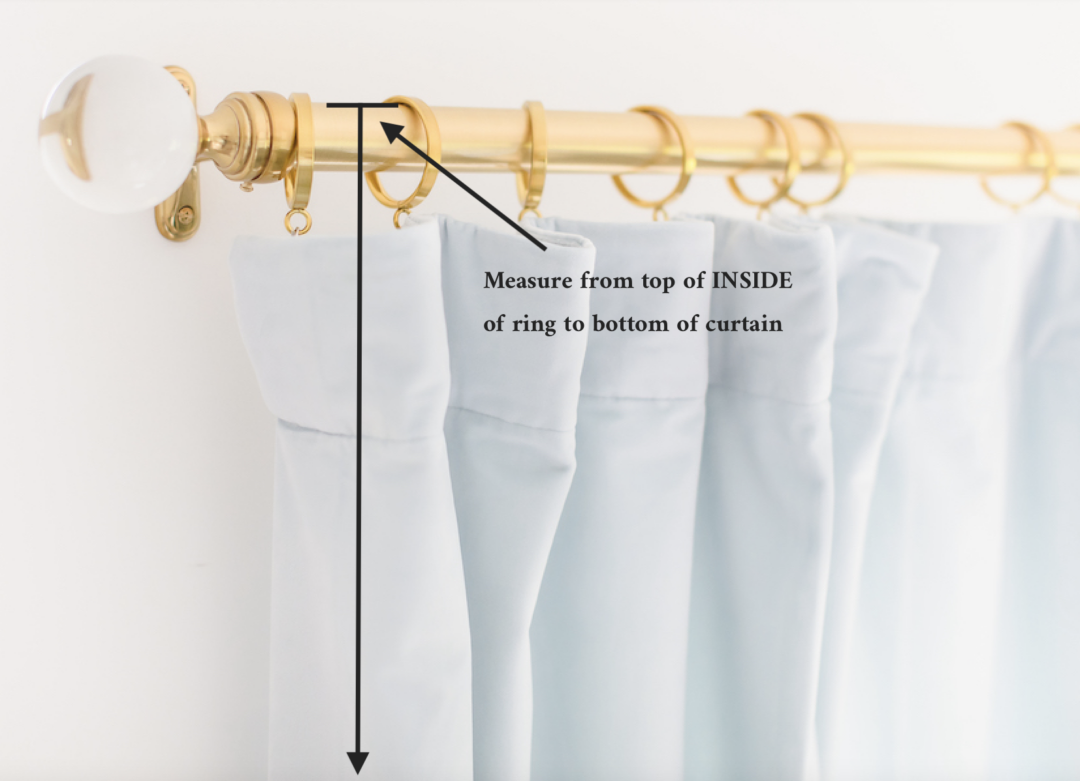
Step 3: Measure. Lay the curtain with the rings flat on the floor and measure from the bottom of the curtain to the INSIDE TOP of the ring. That measurement will tell you where the top of your curtain rod needs to be. This is for curtains that will hang just on the floor. If you want a puddle, add a few inches to your total length.
Step 4: Install Your Rod. Install the curtain rod so the top of the rod matches your measurement. Put the brackets up first, spacing them around 6″ outside the frame of the window if you have the space. Then put the rings onto the rod and place the rod into the brackets. Then add your finials and tighten the screws. Then you can simply clip on the curtains into each ring.
Nursery window treatments are always a challenge, but hopefully this guide helped you understand how to use curtain rings if you decide to go that route!
Need more nursery curtain tips? Read our Ultimate Guide to Blackout Drapery post.
